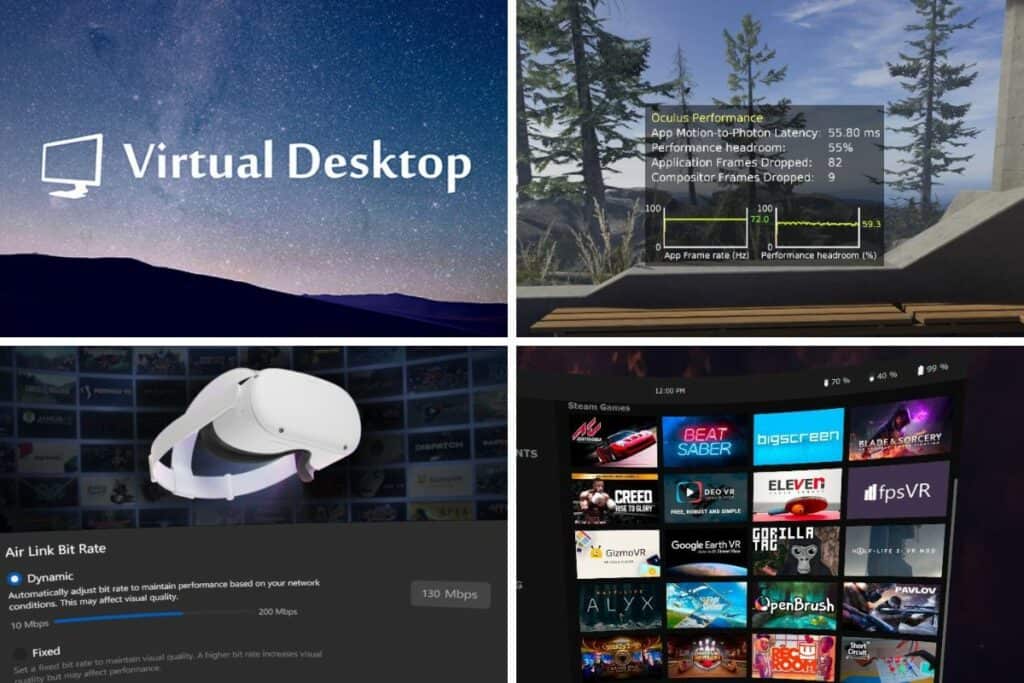
There are now several options to allow you to play PC VR content completely wirelessly. Air Link is the official option from Meta that has now been implemented for all Quest 2 users, and Virtual Desktop is a third-party application that allows you to do the same thing, with some additional functionality. This article is going to look at all the pros and cons of Airlink vs Virtual Desktop, to find out which is the best option for wireless PC VR on your Meta Quest 2, and other standalone headsets.
Air Link is simple to use, free, and works well on Quest 2 if you have the right setup. Virtual Desktop has more features and slightly better performance but is a paid product. Most people should try Air Link first, and move to Virtual Desktop if better performance or specific features are needed.
Air Link Vs Virtual Desktop For PC VR
Both Air Link and Virtual Desktop are options that allow you to experience PC VR content without being physically tethered to a VR-ready PC with a cable. They both have a number of pros and cons, and your choice will depend on your individual setup and priorities.
- Air Link is a free feature on the Meta Quest 2 that allows you to play PC VR content wirelessly.
- Virtual Desktop is a paid-for app that allows you to enjoy wireless PC VR on the original Quest as well as Quest 2. It will also have support for other standalone VR headsets in the future. Virtual Desktop was developed by Guy Godin and initially released in 2016, well before Air Link.
Both these options mean that you don’t need to worry about getting tangled up while using a physical cable to connect your headset to a PC. It’s got to the point where I almost never use the Link cable because the quality of wireless PC VR has become sufficiently good, and any drawbacks are outweighed by the pleasure of being able to play without having a cable getting in the way.
In fact, wireless PC VR solutions have become so good that the Quest 2 is now my preferred PC VR headset, and I prefer using it over my wired Reverb G2, simply because I have the freedom of having no wires. Now that Meta has their own wireless PC VR functionality and is offering it for free, it does raise the question of whether it is still worth paying for Virtual Desktop.
Pros And Cons Of Air Link
| Pros of Air Link | Cons Of Air Link |
| Integrated into Quest 2 software | Tied into the Oculus ecosystem |
| Really easy to use | No access to the headset options or interface while in use |
| Free | Fewer options to adjust performance |
| Works for all PC VR games, not just Oculus store content | Harder to take screenshots and videos |
| Easy to adjust settings to balance latency and picture quality | Lacks some features that Virtual Desktop has |
Pros And Cons Of Virtual Desktop
| Pros Of Virtual Desktop | Cons Of Virtual Desktop |
| Can launch all VR games from one dashboard | Costs Money |
| Great User Interface and highly customizable | Breaks controllers support for some games |
| Slightly better performance for some people | Can cause performance issues in some games |
| Active Discord for technical support and news | More difficult to setup |
| Retains access to Quest 2 headset settings while in use | You need to start the streamer app every time on your computer |
Should You Use Air Link Or Virtual Desktop?
Whilst both options really are excellent, there are big differences in the experiences of using Air Link and Virtual Desktop, as well as differences in how they actually work.
The Case For Air Link
Air Link essentially gives you the same experience and all of the functionality that you would have if you connected your Quest 2 to your computer with the Link cable, and a similar experience to using a Rift headset.
Now that Air Link has been officially launched and is fully integrated into the Oculus software, I would highly recommend trying this option first. My experience of using Air Link has been very positive, and I have always enjoyed excellent performance and low latency.
However, my opinion is influenced by the fact that I have an ideal hardware setup and have not had any technical issues with using Air Link. There are plenty of people who have tried Air Link and found the performance to be poor, either as a result of their hardware setup, or other software issues that are unique to their situation.
As someone who is heavily involved in the VR scene, I play a wide variety of VR games and experiences, and I’ve been consistently impressed by Air Link and how it has improved over time. The great thing about Air Link is that it is free, so gives everyone a chance to test out wireless PC VR without any additional cost.
If you experience poor performance, and you have tried simple things like adjusting the position of your router, and double checking your Wi-Fi connection and your hardware, then Virtual Desktop is an option that has a realistic chance of providing a better experience.
The Case For Virtual Desktop
Virtual Desktop offers good value for the price, and it is a fantastic piece of software. It runs as an app on your headset, meaning that you can still access all of the features on your headset while using it. You just press the Oculus button, as you would when playing any other game, and you can access settings and other areas of your headset.
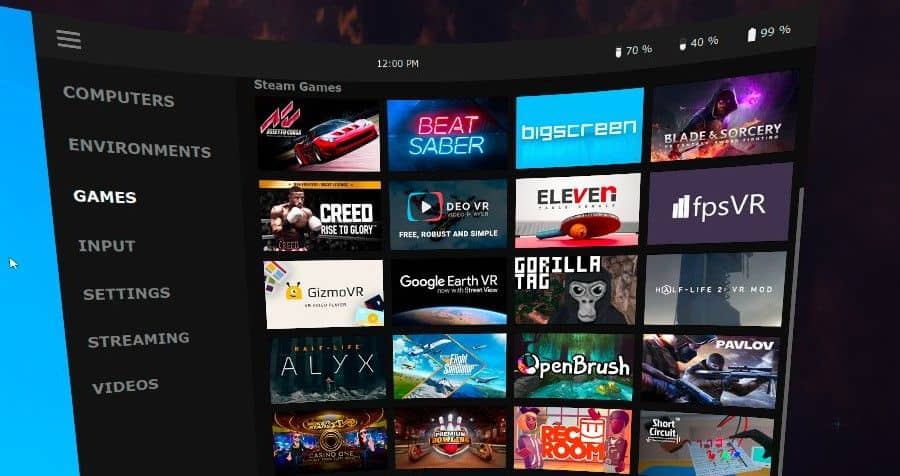
The Virtual Desktop dashboard is really well designed and can be accessed by pressing the menu button on your left controller. This menu slides in from the right and allows you to change a wide variety of settings, as well as launch all of your VR games from one place. This is really helpful, as you don’t need to search through the Oculus app or Steam to find what you are looking to play.
It’s hard to be sure whether Air Link or Virtual desktop provides better performance overall, and I suspect that performance will vary depending on your individual hardware and software setup. The average latency I encountered using Air Link was 55ms, vs 47ms for Virtual Desktop, so it looks like Virtual Desktop is performing slightly better for me. However, I could not perceive any difference in the gameplay and was not aware of any noticeable lag when playing any games.
Aside from a few minor issues with one or two games not loading properly from the Virtual Desktop menu, I’ve been really impressed with it. If it wasn’t for Air Link being free, Virtual Desktop would be the option that I would recommend. The UI is slick, and there are loads of options to customize the bitrate, graphics, refresh rate, etc to ensure that you get a good balance between the visuals and latency.
Another big advantage of Virtual Desktop is that it works for the original Quest headset, and for Pico headsets, and will likely support other wireless PC VR headsets in the future. I like the idea of supporting a platform-agnostic solution, and it should make it easier when moving to different headsets in the future.
The Setup Process: Air Link Vs Virtual Desktop
The hardware requirements for both Virtual desktop and Air Link are essentially the same, but they are really important to get right before you go further. You need to have a suitable PC, router, Wi-Fi connection, and internet connection to get achieve a low latency connection that will provide smooth gameplay. After this, the process for using Air Link and Virtual Desktop differs quite a lot, so let’s look at each in turn.
Air Link Setup
You will need the following hardware to ensure that your experience using Air Link is as good as possible.
- You will need a Meta Quest 2 headset. Quest 1 is not supported.
- You need a Wi-Fi 5 or Wi-Fi 6 (AC or AX) router, that should ideally be in the same room when using your VR headset.
- Your router should be placed in direct line of sight to your headset, ideally at least 1m off the ground.
- Your PC should be connected to your router via a wired ethernet connection.
- The headset should be connected to Wi-Fi via the 5GHz band
- The PC hardware requirements for Air Link are the same as for Quest Link.
Whilst it may be difficult to have your main router in such a perfect position, some people buy a second router and put it in the room you use your Quest 2 in. This is how I achieved a good setup for Air Link, and I now have a Wi-Fi 6 router in the room I use for VR in direct line of sight of me when I am playing.
Another option is to purchase a D-Link VR Air Bridge, which is a USB dongle for Quest 2 wireless PC VR that you plug into your VR-ready PC directly. This has been developed in partnership with Meta, ensuring that the Wi-Fi connection to your headset is optimized as much as possible.
Steps To Use Air Link
- Make sure that the Oculus software is installed on your computer. You can download this here.
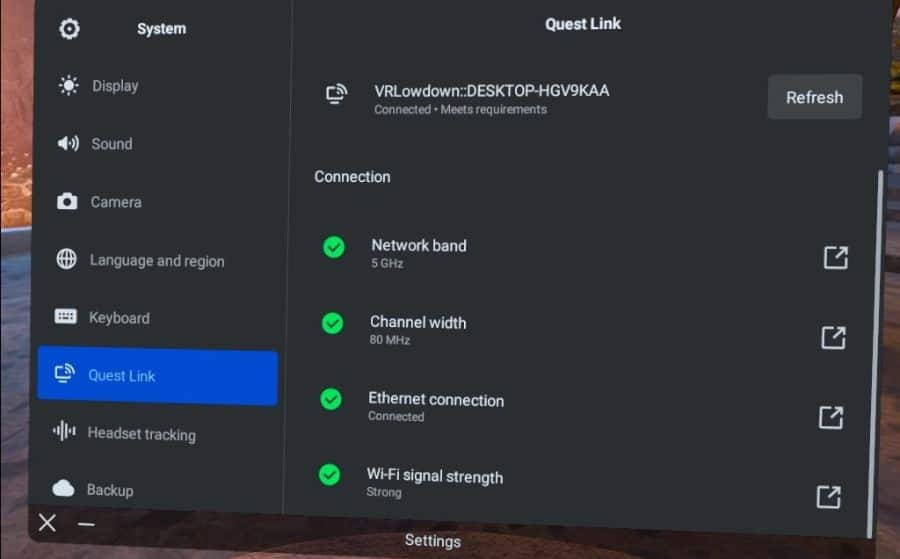
- Once the Oculus software is installed on your computer, turn on your Quest 2 and navigate to the Settings menu, then System settings, then Select Quest Link. Toggle Quest Link on.
- You can now connect to your computer by clicking the button beside Launch Quest Link, or you can also open the Quick Settings menu from the left side of the Oculus taskbar.
- The first time you try to connect, you will see a pairing code on the screen of your Quest 2. You must make sure this matches the code that appears on your desktop Oculus app and click confirm. After this, you will load into the Rift Home menu and you can play all your PC VR games and apps.
Virtual Desktop Setup
Here is what you’ll need to get started with Virtual Desktop:
- A VR-ready PC. If you aren’t sure if your PC is suitable for VR, you can download the SteamVR Performance Test app to check.
- Windows 10 or 11 64-bit or macOS Mojave (10.14+)
- Your computer should have a wired connection to a 5 GHz AC or AX Wi-Fi router
- Your router should ideally be in direct line of sight of you when you are using your VR headset.
- You’ll need a Quest 2, Quest, or another compatible standalone VR headset.
Once you’ve confirmed that you’ve got all the right hardware, here are the steps to get Virtual Desktop and start using it.
- Make sure the Oculus software is installed on your computer. You can download and install this from the Meta website.
- Buy Virtual Desktop from the Meta Quest 2 store. Turn on your Quest 2 and go to the store page and search for Virtual Desktop. It normally costs $20/£15. Install this on your device once you have purchased it.
- You must buy the version of Virtual Desktop from the Meta Quest 2 store for PCVR streaming to work on your Quest 2 properly. Do not buy the Steam version or any other version of Virtual Desktop for this purpose.
- Download and install the free Streamer App from the Virtual desktop website. This step is essential for PC VR streaming on Quest 2 as it creates a virtual server on your PC and makes your Quest 2 think it is connected to your PC via Link Cable.
- Once you have downloaded the Streamer App, open it and enter your Oculus/Meta username. If you can’t remember your username, you can open the Oculus app on your computer and click the “Follow List” button at the bottom of the left menu to see it.
- Put your Quest 2 on and load the Virtual Desktop App. After a brief pause, your computer desktop should appear.
Once you are using Virtual Desktop, you should see your computer screen in front of you. You can press the menu button on your left controller to bring up the Virtual Desktop menu at any time.
You can launch any VR games from the Games tab, without having to go into your Steam or Oculus apps separately.
There are lots of options and settings that can be adjusted in the Settings and Streaming tabs of the menu. You can adjust the refresh rate of your headset, the bitrate of the stream, the graphics quality, and sound settings, and you can also monitor performance to find just the right balance between quality and latency
You can also change the environment that you experience inside Virtual Desktop, to make it feel like you are sitting in a cinema, an apartment, floating in space, sitting in front of a gaming computer, or several other environments.
Air Link Vs Virtual Desktop: Which Is Better?
There are many factors to consider when choosing one of these two wireless PC VR solutions, so let’s look at a few of the things that may be important to you.
Latency
Virtual Desktop has slightly less latency for my setup when tested across a range of Oculus and Steam games. I averaged 47ms latency when using Virtual Desktop and 55ms latency when using Air Link. Despite this, I could not detect any discernable difference in the experience, and I was able to play all of my PC VR games without any deterioration in the experience compared to a wired connection.
The largest impact on the latency you will experience with a wireless PC VR setup is with the positioning of your router and your hardware setup.
Picture Quality
Although both wireless VR solutions produced clear pictures, I feel that Air Link has slightly fewer visual artifacts at the same bitrate level. Although both solutions use significant compression of the images, I feel the picture quality stands up really well compared to wired VR. Both Air Link and Virtual Desktop now support 120Hz mode.
Cost
Air Link is free while Virtual Desktop costs $20/£15. For this reason, most people should try Air Link first, and only move to Virtual Desktop if they need the additional functionality that it offers, or have issues with performance with Air Link.
Ease Of Use
Air Link is incredibly easy to use, and you can start using it in only a few seconds. The setup process is very simple and there is no technical knowledge required, other than ensuring that your hardware is suitable. Virtual Desktop is also quite user-friendly, but most people will need some guidance to set it up. Once it is installed, you just need to remember to have the Streamer app running on your computer. After that, you just launch the app and it loads in a few seconds.
The UI of both Air Link and Virtual Desktop are easy to use and very intuitive. Virtual Desktop has more options and is a more powerful piece of software, but it has been well designed to cater to everyone.
Bottom Line: Should You Use Air Link Or Virtual Desktop?
Overall, I feel that Virtual Desktop is a better solution, but it is a close call. If they were both the same price, I would recommend Virtual Desktop over Air Link. However, Air Link is free and it also does a fantastic job. The actual performance for most people is very similar between the two apps, so most people should try Air Link first.
Is Air Link The Same As Oculus Link?
Air Link is the official Meta wireless solution for PC VR with the Quest 2, while Oculus Link (Quest Link) is the wired version that allows you to connect your Quest 2 to a VR-ready PC by USB-C cable to use your headset as a fully-functional PC VR headset.
Is Air Link Good On Quest 2?
Air Link is an excellent option for wireless PC VR on the Meta Quest 2. It is a free feature that is integrated into the Quest 2 software, and as long as you have a PC and router setup that meets or exceeds the recommended requirements, you should have a great experience. The average latency I encountered when using Airlink was 55ms, vs 47ms for Virtual Desktop. I could not perceive any difference in this and was not aware of any noticeable lag when playing any games. Your experience may differ.
Do You Need A Good PC For Air Link?
Your PC should meet the same recommended specifications as Quest Link. You’ll need an Intel i5-4590/AMD Ryzen 5 1500X or greater, 8 GB+ RAM, 1x USB port, and one of the GPUs in this list. It is highly likely that if your PC is less than 5 years old that you should be able to use Air Link.
Do You Need Virtual Desktop For Air Link?
Virtual Desktop and Air Link are separate solutions for wireless PC VR. You only need to have one of these to enjoy wireless PC VR.