If you’ve noticed the thumbstick on your Quest 2 controller misbehaving, you are not alone. Quest 2 controller drift is a common problem that can seriously impact your ability to use your headset. The good news is that there are a number of solutions that will fix the majority of issues causing controller drift.
Quest 2 controller drift is often caused by debris around the thumbstick or poor controller calibration. Rotate and move the thumbstick for a few minutes, or use contact cleaner to remove obstructions. Remove and replace the batteries, or un-pair and re-pair your controller to reset the calibration.
If you’ve started experiencing Quest 2 controller drift, you should work your way through the solutions in this article. You can fix most causes of controller drift with these techniques.
How To Fix Oculus Quest 2 Controller Drift
Controller drift is a common problem with any type of controller that uses a thumbstick. If you’re playing a game in VR, this can lead to your character continuing to walk when you want them to stop, or inconsistent responses whenever you use the thumbstick. Let’s work through the solutions one by one.
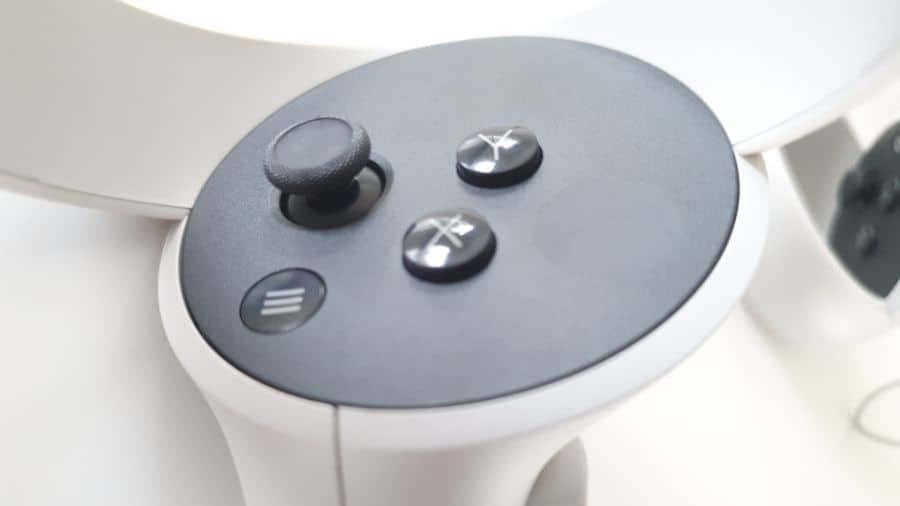
Move And Press Down On The Thumbsticks
Many causes of Oculus Quest 2 controller drift are caused by a tiny bit of debris or dust that has found its way into the mechanism of the thumbstick. If you can somehow dislodge this piece of debris, you will solve the problem.
Repeat the following process for a few minutes:
- Hold your controller upside down, so the thumbstick is pointing at the ground. This will let gravity assist in the removal of any debris.
- Move the thumbstick forward and backward and side to side for 30 seconds.
- Rotate the thumbstick through its entire range of movement for 30 seconds
- Press down on the thumbstick to engage the thumbstick button and then repeat the two steps above.
- Check to see if this has fixed the controller drift problem on your Quest 2.
Remove The Batteries From Your Quest 2
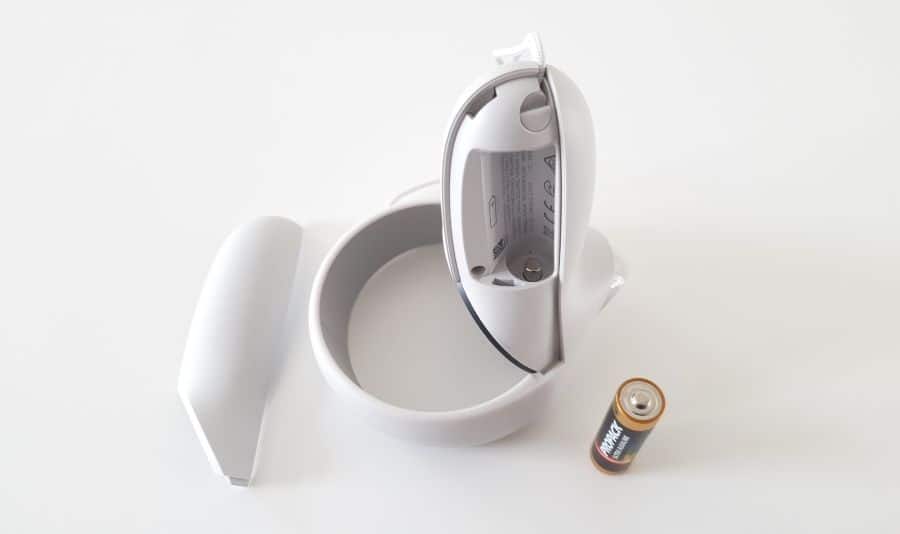
Occasionally, the thumbstick in one of your Quest 2 controllers can lose its calibration, and the best way to reset this is to remove the batteries completely and then replace them. I recommend removing the batteries for a few minutes before replacing them.
Your headset will then detect the controller again and recalibrate. A lot of people have reported that this has fixed their controller drift issues, and I have also had success with this method previously. This is the ever-faithful “turn it off and on again” trick, and also works for some other Quest 2 hardware problems.
Unpair And Re-pair Your Controllers
Another option to force your Quest 2 touch controller to recalibrate is to manually un-pair and then re-pair it with your headset. The easiest way to do this is via the Oculus app that you should have on your phone. Follow these steps:
- Turn your Quest 2 on and make sure your controllers are also on.
- Open your Oculus app and select the Menu button in the bottom right corner.
- Select Devices from the menu, and make sure that your Oculus Quest 2 is selected.
- Scroll down to the bottom and select the Controllers menu.
- Select the controller that is having stick drift issues from the menu.
- Select Unpair Controller, and then confirm by clicking UNPAIR.
- Now select Pair New Controller in the Controllers menu.
- Choose the correct controller that you need to pair, either the right or left Quest 2 controller.
- For the left controller, hold down the Menu and Y buttons until the light on your Quest 2 controller starts to flash, then release.
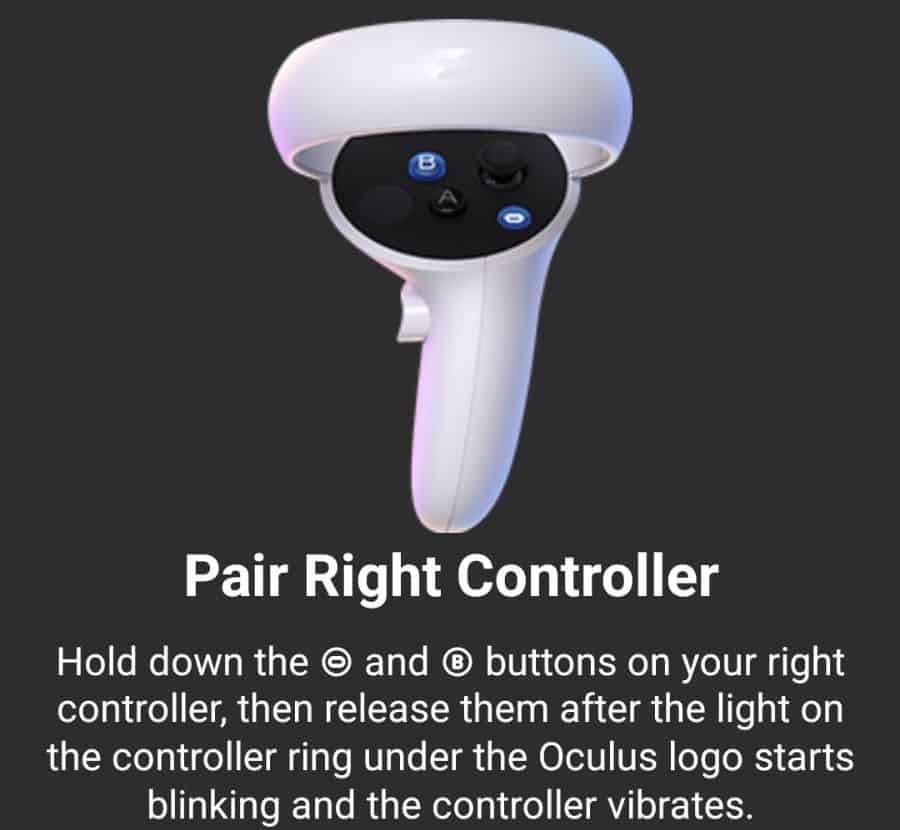
- For the right controller, hold down the Oculus and B buttons until the light on your right Quest 2 controller starts to flash, then release.
- Your app should now confirm that your controller has paired.
Use Compressed Air Around The Thumbstick
If none of the previous solutions have worked, the next thing to do is to try more methods to dislodge any debris that might be preventing the thumbstick from centering properly on your Quest 2 controller. I have previously had good success using compressed air to dislodge dust and crumbs from the controller thumbstick, but you need to do this in a way that produces significant air pressure.
The best option is to use something with a small aperture, that can produce high-pressure airflow to a small area. You can purchase canned air with a fine straw nozzle, but I actually use a hand air pump with a fine nozzle that produces plenty of airflow.
The trick is to hold the nozzle so that it is blowing directly into the gap around the thumbstick, and you should push the thumbstick to the limit of its movement to make it easier for the air to make it into this gap.
This method will only work if the debris has not adhered to the mechanism of the thumbstick, so your results will vary.
Clean With Electrical Contact Cleaner
If you haven’t had success with air, the next option is to use an electrical contact cleaner to remove or dislodge any debris. This is a specialist fluid that you can purchase inexpensively online and it is designed to remove residue and debris from electrical components without damaging them.
I have used products from several different companies who specifically market this as being safe to use on game controllers, but please be aware that Meta does not recommend using any products such as these on your controller.
I have previously used this technique on a number of game controllers with good success, and this is the technique you should use:
- Spray a small amount on the base of the thumbstick of your Quest 2 Controller. Most products come with a straw or fine nozzle to allow you to accurately apply the cleaner into the gap around the thumbstick.
- Move the thumbstick back and forth and around in large circles for 1-2 minutes to ensure the contact cleaner gets into all parts of the thumbstick mechanism.
- Leave for another 10-15 minutes until it has fully dried.
- Check to see if this has resolved your issue with Quest 2 controller drift.
Here is a video that perfectly demonstrates the technique for fixing controller drift issues with electrical contact cleaner.
Clean With Isopropyl Alcohol
If you do not have electrical contact cleaner, another option is to use isopropyl alcohol to clean the thumbstick. Ideally, this should also be applied as a fine spray around the edge of the thumbstick, but a little on a microfiber cloth, gently rubbed around the base of the thumbstick is a reasonable alternative.
Contact Oculus Support For Help With Quest 2 Controller Drift Problems
If you are still having problems with Quest 2 controller drift, then your next option should be to contact the Quest 2 support team directly. You will be asked to clarify which controller you are having problems with, and what type of problem you are having, and you will then be presented with a form to complete to provide details of your issue.
The support team may be able to suggest further options to fix your controller, or you may be able to negotiate a return and replacement. You may be required to provide photos or videos of the issue you are having prior to them agreeing to arrange a replacement.
Remove The Thumbstick And Clean Under It
If nothing you have done so far has fixed the thumbstick drift issues you are having, then this next option may be something you would like to consider. From speaking to a number of people who have tried this, it appears to have a high success rate, but I don’t recommend doing it, as there is a high risk that you will permanently break your controller. However, if you are facing the prospect of trying this or buying a new controller, then you haven’t much to lose.
The aim of this option is to remove the plastic face plate that surrounds the thumbstick and buttons on the quest 2 controller and remove the thumbstick to clean under it. The only challenge is removing the gray plastic cover, which is secured with adhesive.
This can be done by using a knife or small flathead screwdriver to pry it off, and then the thumbstick can be removed with ease. Once the thumbstick is removed, you can clean under it with contact cleaner. The thumbstick should pop back on easily, and the faceplate can be replaced.
Here is an excellent video that outlines the process for removing the faceplate and cleaning under the thumbstick of your Quest 2 controller.
Can You Buy A Replacement Controller For Quest 2?
If you’ve exhausted all options to fix your Quest 2 controller, the good news is that you can buy a replacement Quest 2 controller from Meta.
Does The Warranty Cover Oculus Quest 2 Controller Drift?
The Quest 2 warranty does cover Oculus Quest 2 controller drift for a period of 1 year from purchase, but there are limitations to this warranty. The problem with the warranty is that the decision about what action to take is at the discretion of Meta.
If you cannot resolve your controller drift issue, Meta support will make the decision to repair or replace the controller, or update software or services so that the controller meets the warranted functionality. If none of these options are possible, they will provide a whole or partial refund.
If you do need to send your controller to Meta to be repaired, they will cover the postage cost, but you could be left without your controller for many weeks before it is returned.